Introduction
The Groovy Templates feature allows you to create your own personalized scripts. Thanks to them, you have a lot of options for adding individual dependencies to a workflow.
Created scripts can apply to conditionals, validators or post functions.
In addition, an important function of the app is the possibility of creating new versions of scripts, which before activation can be independently and non-invasively tested in a selected and limited environment.
This means that you don't have to overwrite a script and test its operation on all projects that use a given workflow, and instead of that, he can create a separate, additional test version that will only work on a project, user group or labels selected by him.
Creating a script
Log in as a user with the Jira Administrators global permission.
To go to a script creation screen, click ![]() and choose Issues.
and choose Issues.
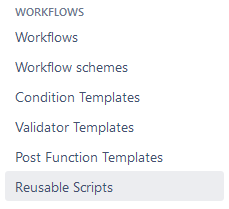
In the left navigation bar in the Workflow section, select Reusable Scripts.
Script creation starts with Add Script, then choose its type and set a name.
In the next step, there will be a console, where you can enter the script.

After the editing is complete, decide the script should be:
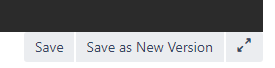
a) activated now - click Save and Activate,
b) tested first - click Save.
Connecting a script with a workflow
The activated script should be connected to the Workflow.
To do this, go to the Workflows tab, then edit the selected Workflow. At this point, select the Transition edition whose script operation should apply to and select conditions or validators or post functions.
After going to the list of functions, select from the list: Groovy Template Conditions / Validators / Post functions.
Next from the list of created scripts, select the one to be added.
![]()
Create a test version of the script
You have the option of creating the next versions of scripts and testing them on only the projects, group of users or labels they choose.
To start testing the new version of the scripts you should:
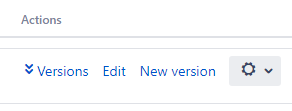
- click New version,
- describe the new version (eg 1.1),
- make changes to the script,
- click Save,
or
- click New version,
- make changes to the script,
- click Save as new version
- describe the new version (eg 1.1).
Starting a test version
To perform a test:
- Click Version button of the selected script to show all its created versions,
- When the version is selected, click Test,
- Go to Test Settings to set the dependencies of the tested transitions.
In the selected script only one version can be active and only one can be tested.
The active and tested version is always at the top of the list.

Test Settings
Thanks to this function, it is possible to set parameters (project, group of users and labels), for which scripts tests will run.
Test Settings work globally, which means that they apply to all tests performed for all scripts. However, you can edit them at any time.
To be able to run tests on a larger database, you can use the function of any of the following, which allows you to run tests in all combinations of given data.
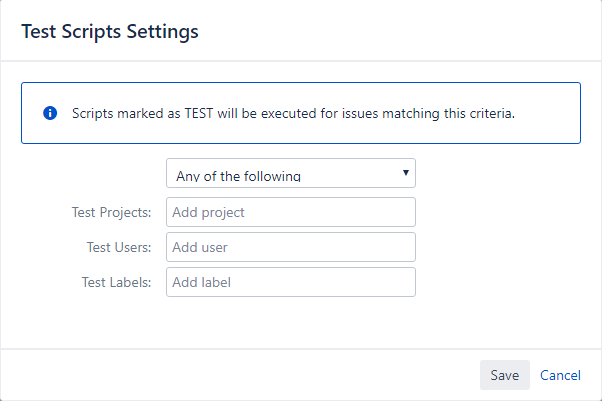
After adding all parameters click Save.
Scripts Import / Export
You can additionally import external scripts to the application and export all those out of the app.
How to import scripts:
- Click on Import scripts:
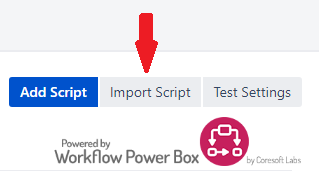
- Choose a file,
- Click Import.
How to export scripts:
- Click on
 ,
,
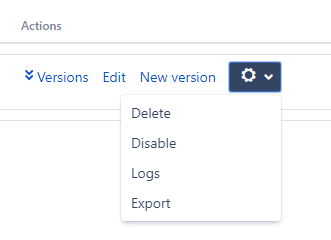
- Click Export, and it's done!