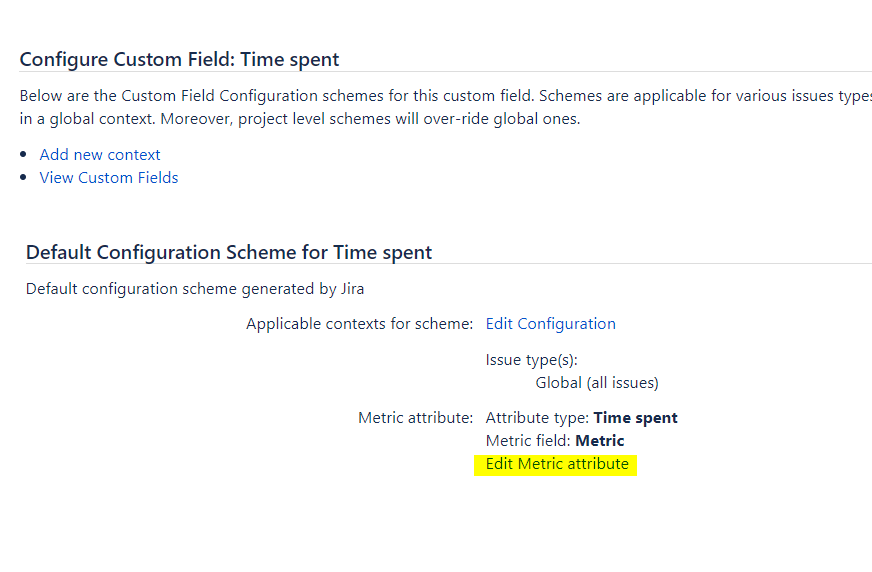
Create SLA Metric Attribute custom fields for every SLA Metric value you want to present in your report.

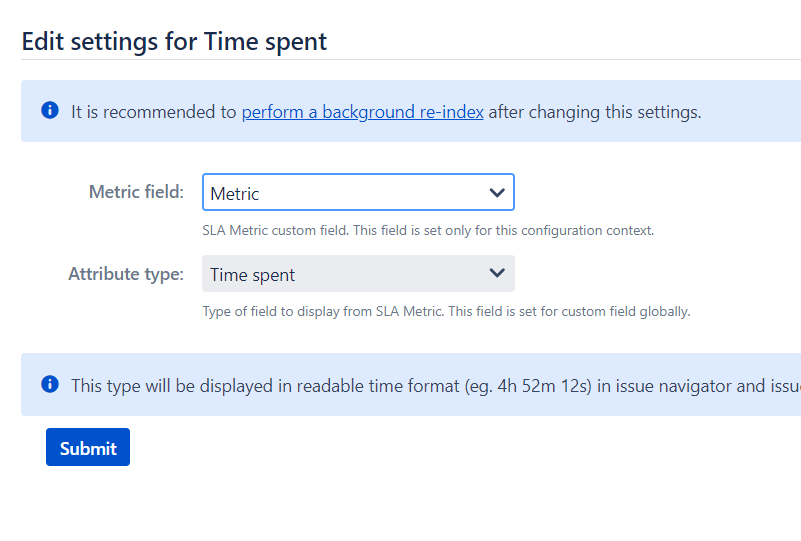
Configure them to fit your needs, choosing a metric field it is based on and the type of value you want to get.
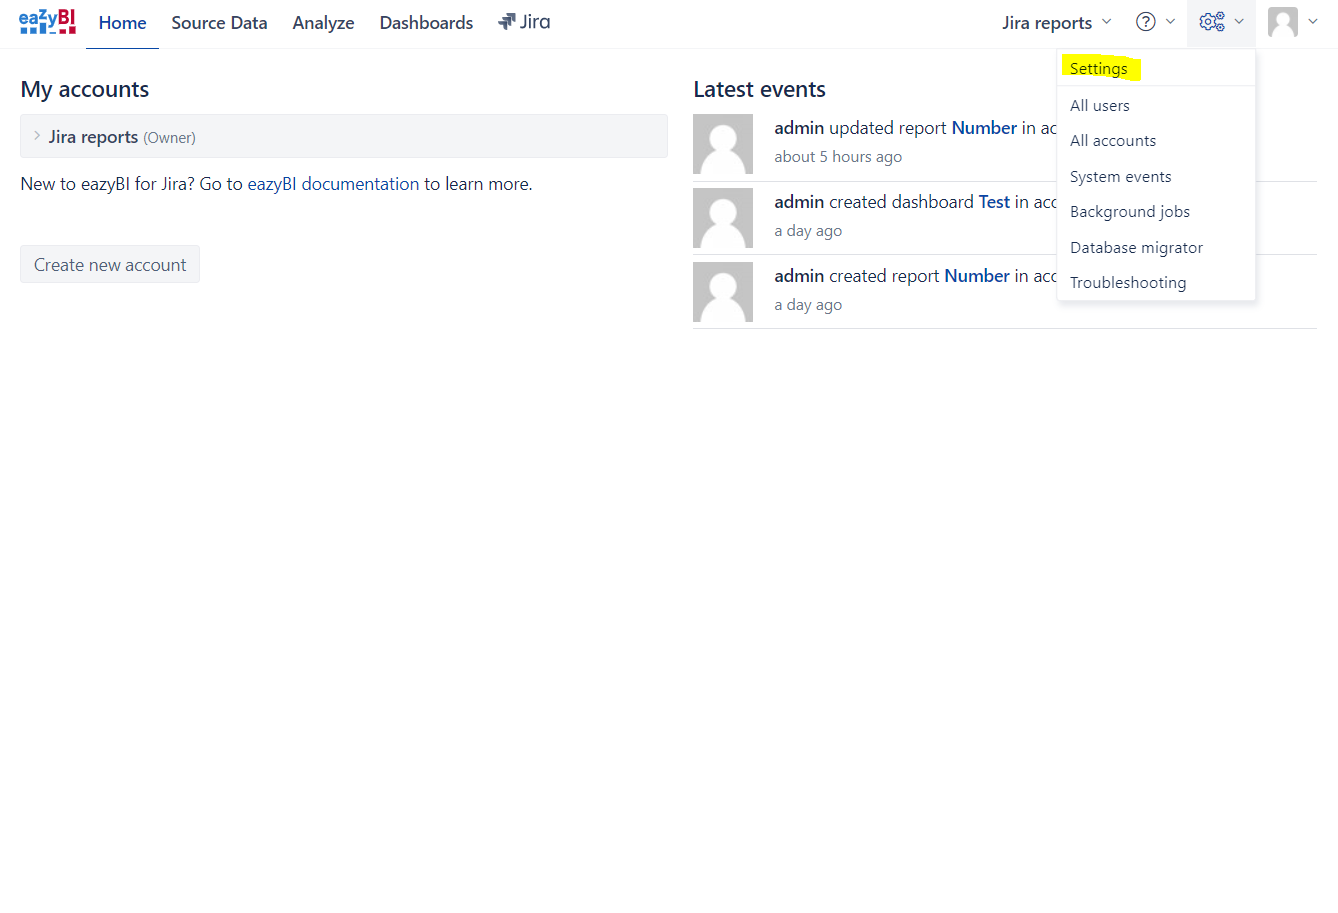
In order to be able to see your custom fields in import and report options, you have to add it in advanced settings first.
Here you can specify custom fields you want to be seen by easyBI. In order to do that the only thing you have to add here is 2 lines of code:
[jira.customfield_NNNNN]
data_type = "integer"
Where NNNNN is the id number of your custom field.
This will render our field as a numeric value as specified in the info tooltip for SLA Metric Attribute configuration screen. Just like with values you get from REST API. This means that the status field will be shown as status code and time values as a number of seconds. If you would like to change those values to more human-readable format, look below.
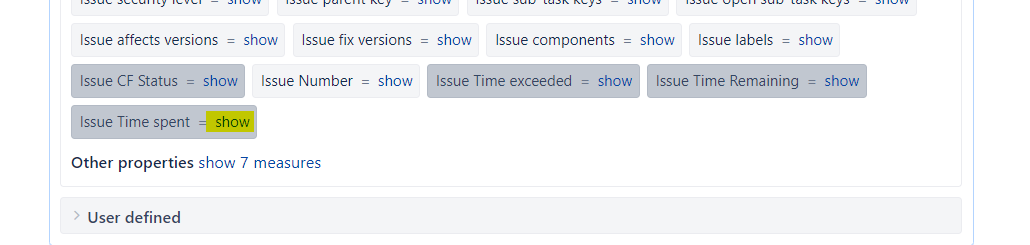
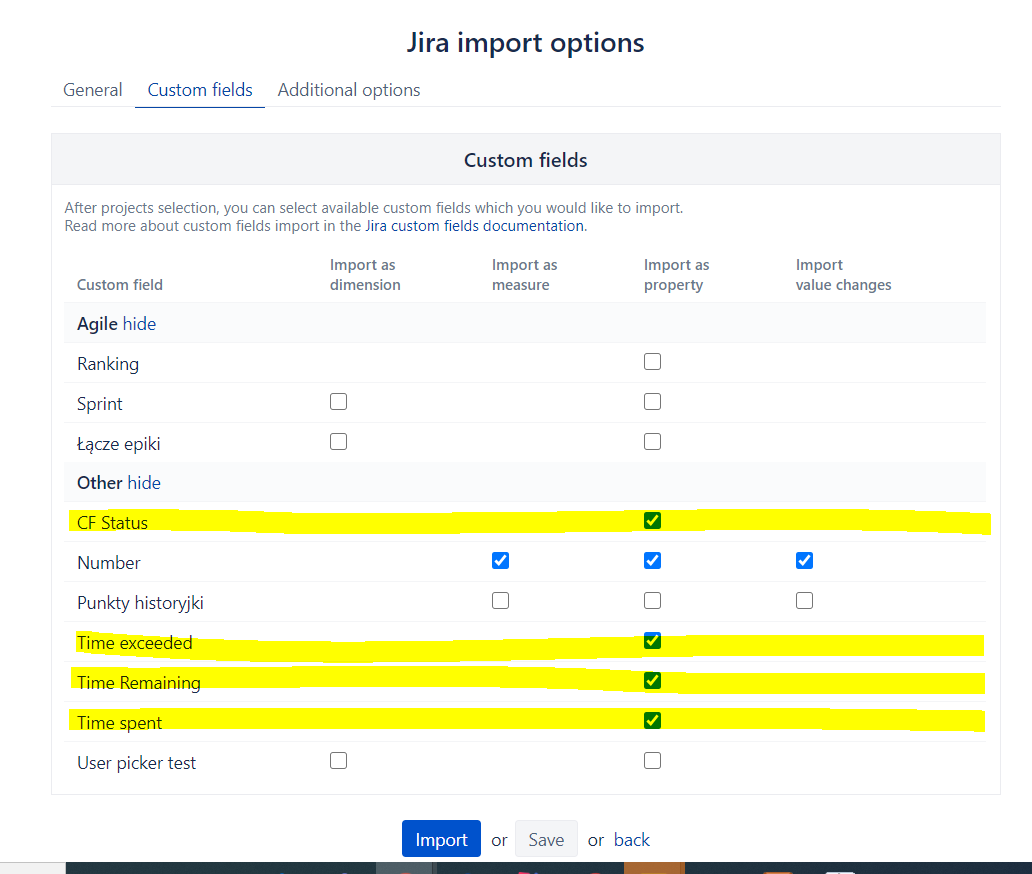
After we define custom fields we want to use in the previous section, we can now see those fields as possible options in “Custom Field” tab for “Jira import options”. Check all custom fields you want to work on with eazyBI. After checking them and importing data, you should see new options while choosing Measures for your report as in the section below.
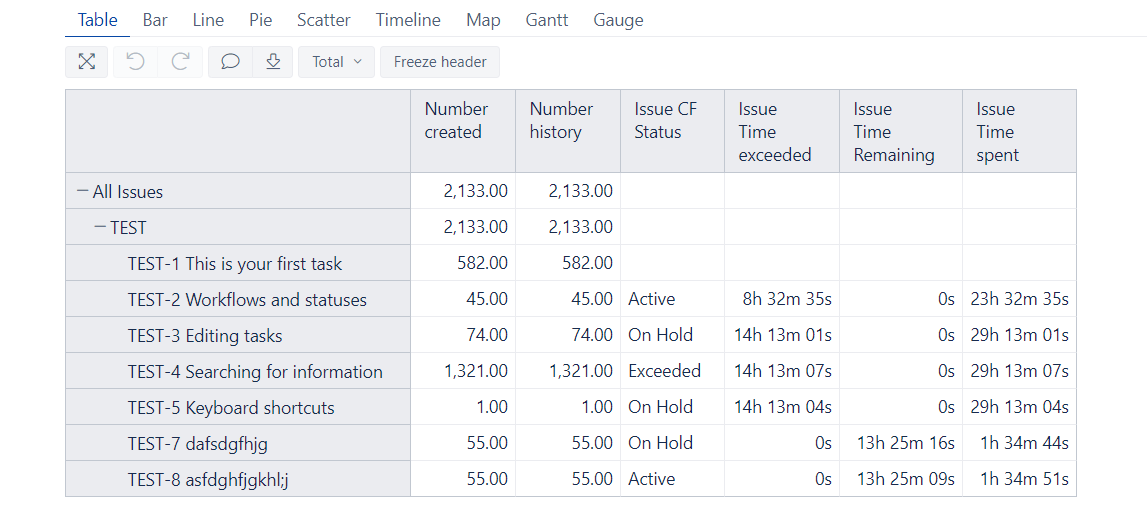
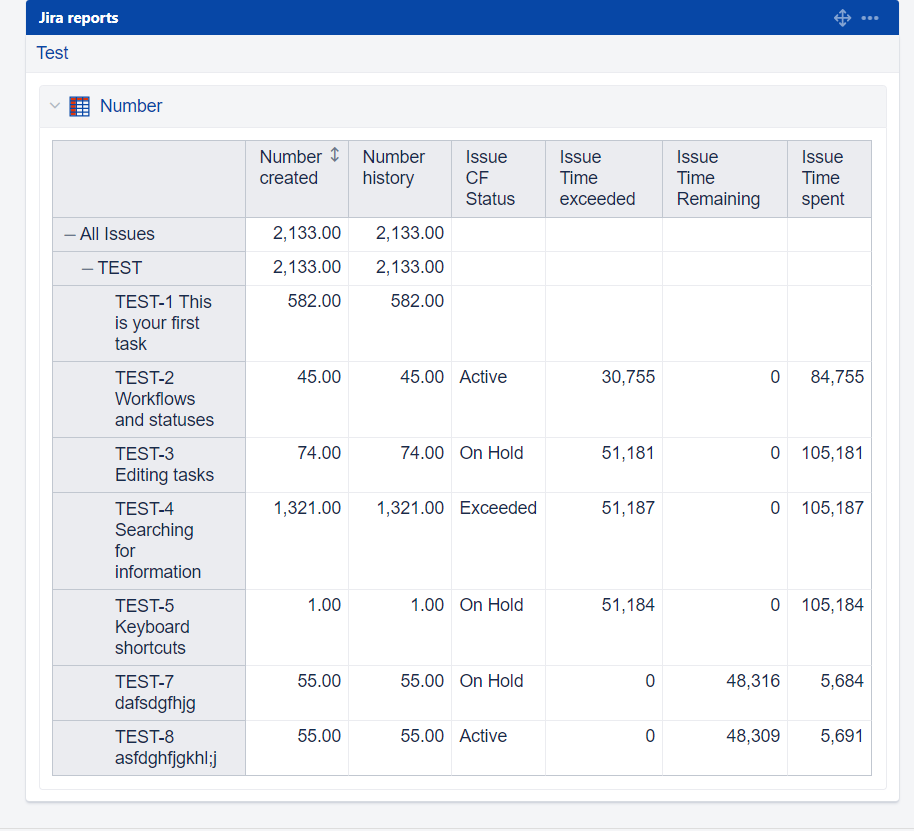
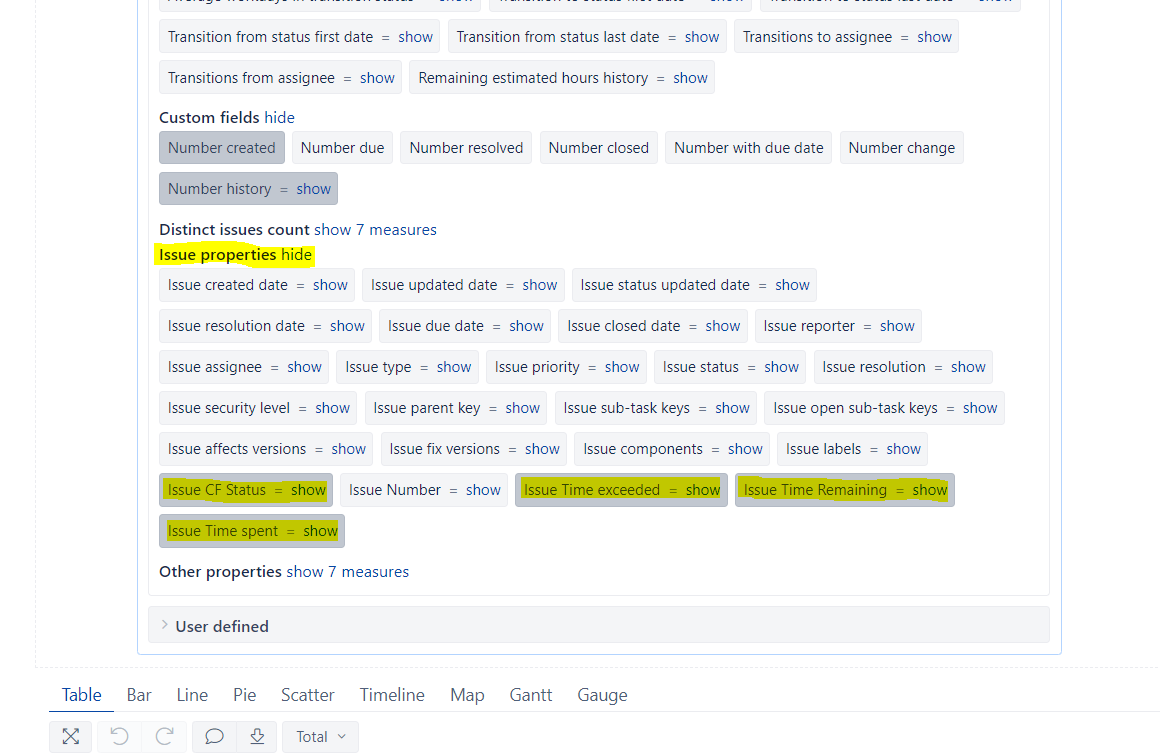
After setting everything up correctly you should see new fields under Measures → Issue properties. You should see your configured custom fields named as follow: Issue + custom field name + options. After choosing your desired custom fields you should see them in your report. For example like on the last screen for table report.

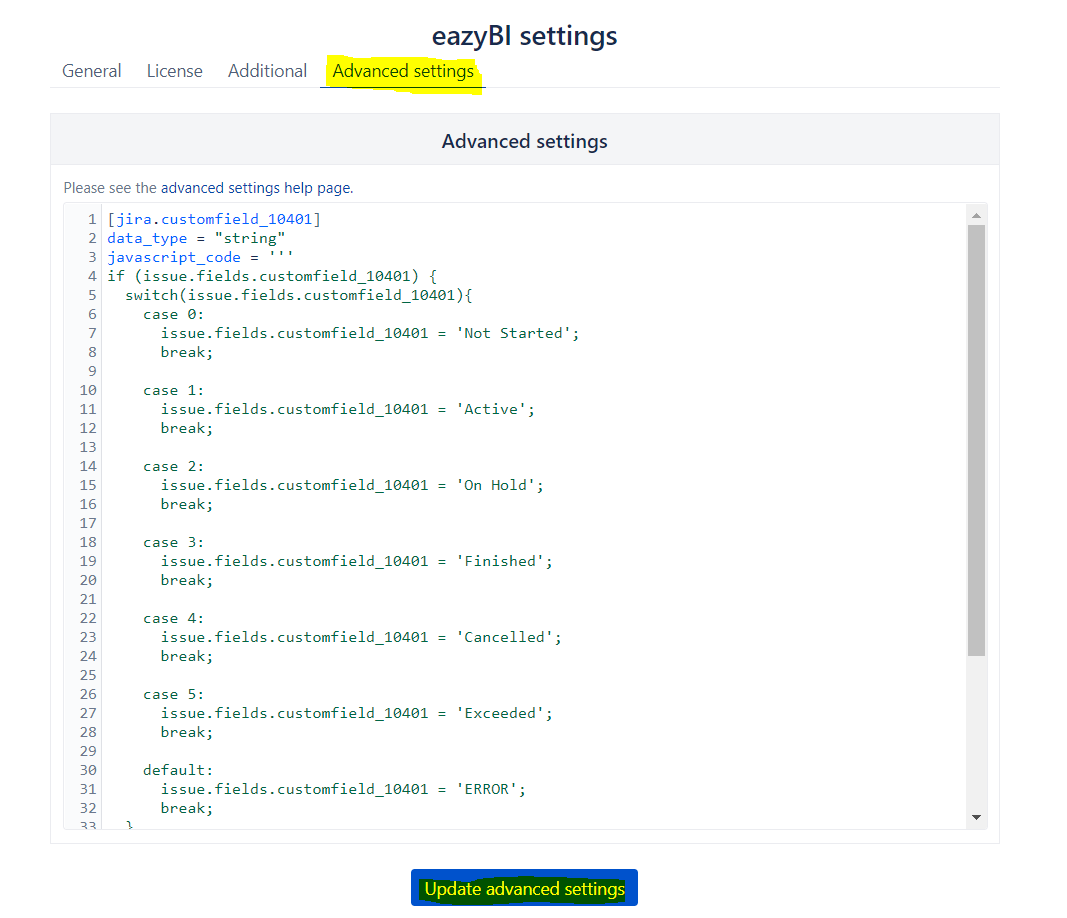
Status field
This code will turn status codes into status names.
[jira.customfield_NNNNN]
data_type = "string"
javascript_code = '''
if (issue.fields.customfield_NNNNN) {
  switch(issue.fields.customfield_NNNNN){
    case 0:
      issue.fields.customfield_NNNNN = 'Not Started';
      break;

    case 1:
      issue.fields.customfield_NNNNN = 'Active';
      break;

    case 2:
      issue.fields.customfield_NNNNN = 'On Hold';
      break;

    case 3:
      issue.fields.customfield_NNNNN = 'Finished';
      break;

    case 4:
      issue.fields.customfield_NNNNN = 'Cancelled';
      break;

    case 5:
      issue.fields.customfield_NNNNN = 'Exceeded';
      break;

    default:
      issue.fields.customfield_NNNNN = 'ERROR';
      break;
  }
}
'''
Time fields
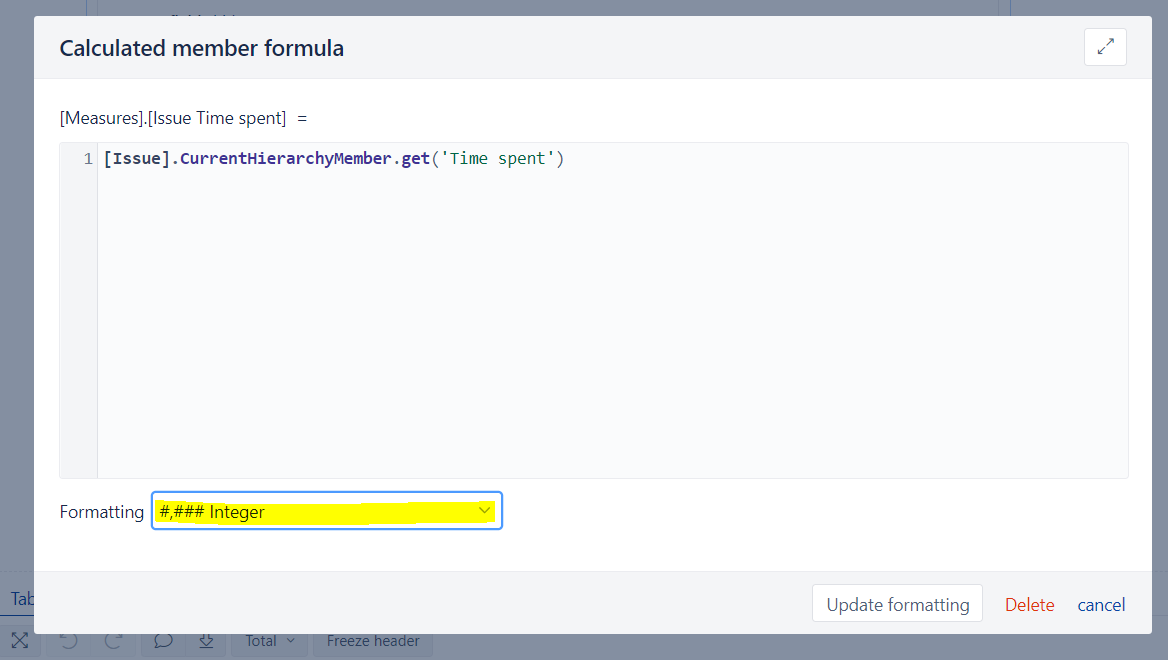
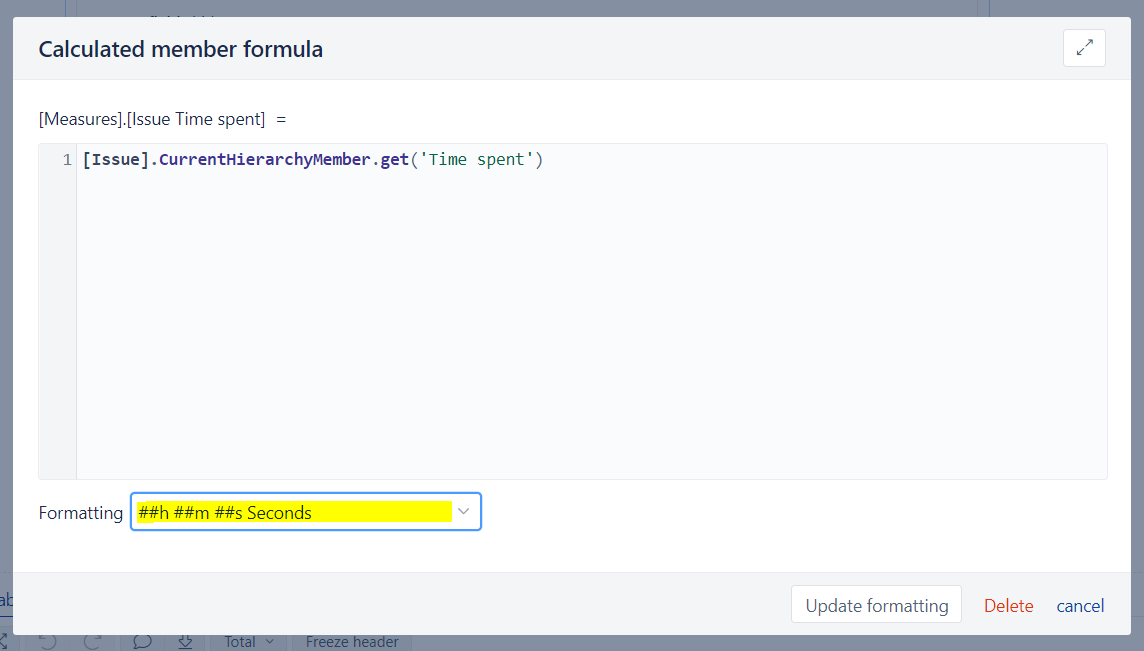
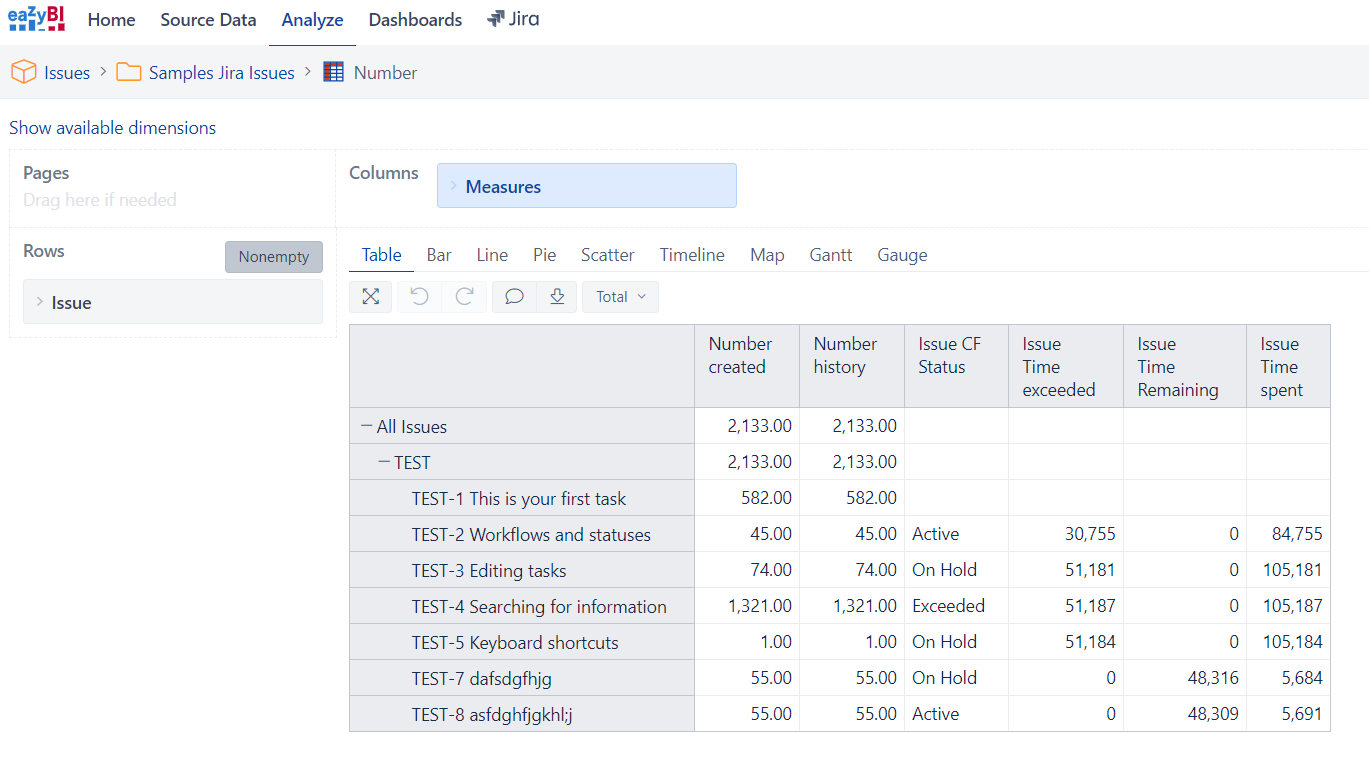
To transform seconds into some other useful format you have to click on “show” link while choosing your report Measures. In the pop up window you will be able to choose formatting. The results of setting this field to Seconds are shown on the last screen.